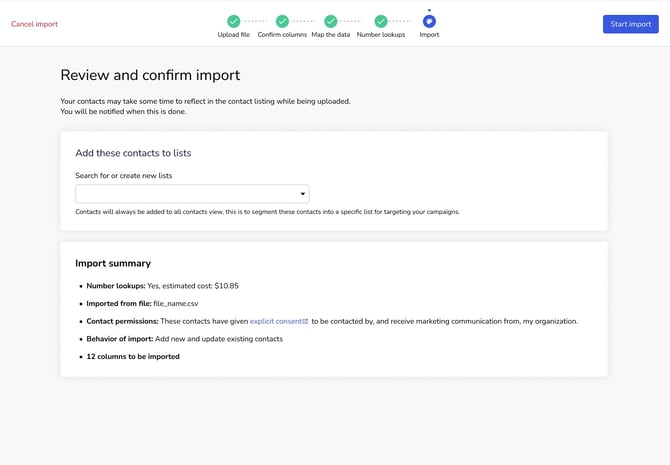
Whether you're switching from another provider or bringing in customer data from other software, Mobiz makes it easy to import your contacts with a simple CSV file.
Looking to add contacts one at a time instead? See Adding contacts manually.
Here's an example of a correctly formatted CSV file:

In this article:
Formatting FAQs
What file types are supported?
We support CSV files, and comma-delimited CSVs work best.
Make sure each column has a title in the top row for every data field you want to import. You must include a phone number field — contacts can't be imported without one.
Does it matter if phone numbers have dashes, parentheses, or spaces?
No — our system detects and reformats these automatically. For best results, use one of these formats: a national number like 4042223333, or the same number with the country code in front, like 14042223333.
Which formatting errors will stop my file from uploading?
- Blank rows — Make sure your CSV has no empty rows anywhere in the file.
- Double quotation marks (") — To quote something inside a cell, use single quotation marks (') rather than double quotation marks (").
What if some of my contacts didn't import?
After you import, Mobiz shows a banner confirming your contacts were accepted and are being processed. Once processing finishes, the banner updates to show how many were accepted versus how many errored out. You can then download a file listing the failed contacts and the reason each one failed.
The most common reasons are:
- Duplicates — the number already exists in the list.
- Improperly formatted numbers — for example, unsupported international numbers or otherwise invalid entries.
If something doesn't look right, message us on live chat and a member of our team will help.
How to import contacts via CSV
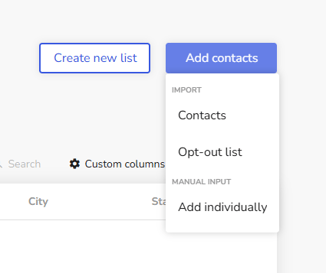
To begin, go to Contacts in the top navigation, click Add contacts, then choose Import contacts from the dropdown.
Step 1: Upload your file
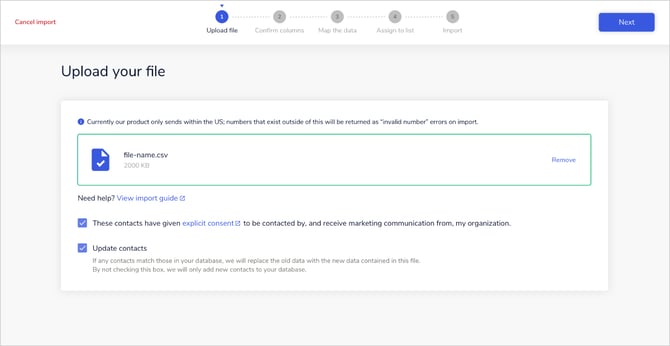
Click the drop files here area, or drag and drop your approved file into it, to upload.
Then check both boxes at the bottom of the page to confirm contact permissions. This confirms your contacts have given explicit consent to receive text messages from you. Learn more in Understanding contact permissions.
Step 2: Confirm columns
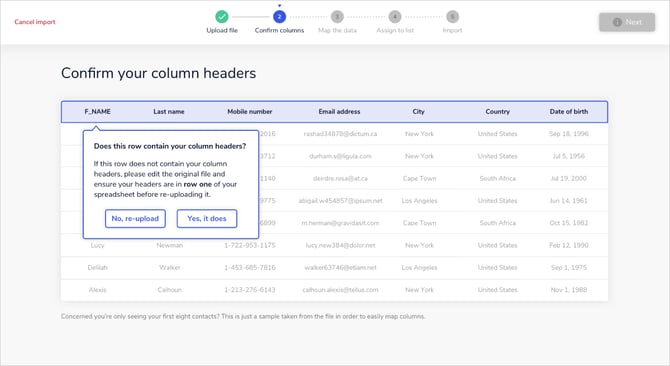
You'll be prompted to confirm your column headers. Your CSV's first row must contain the column headers, or the import won't work.
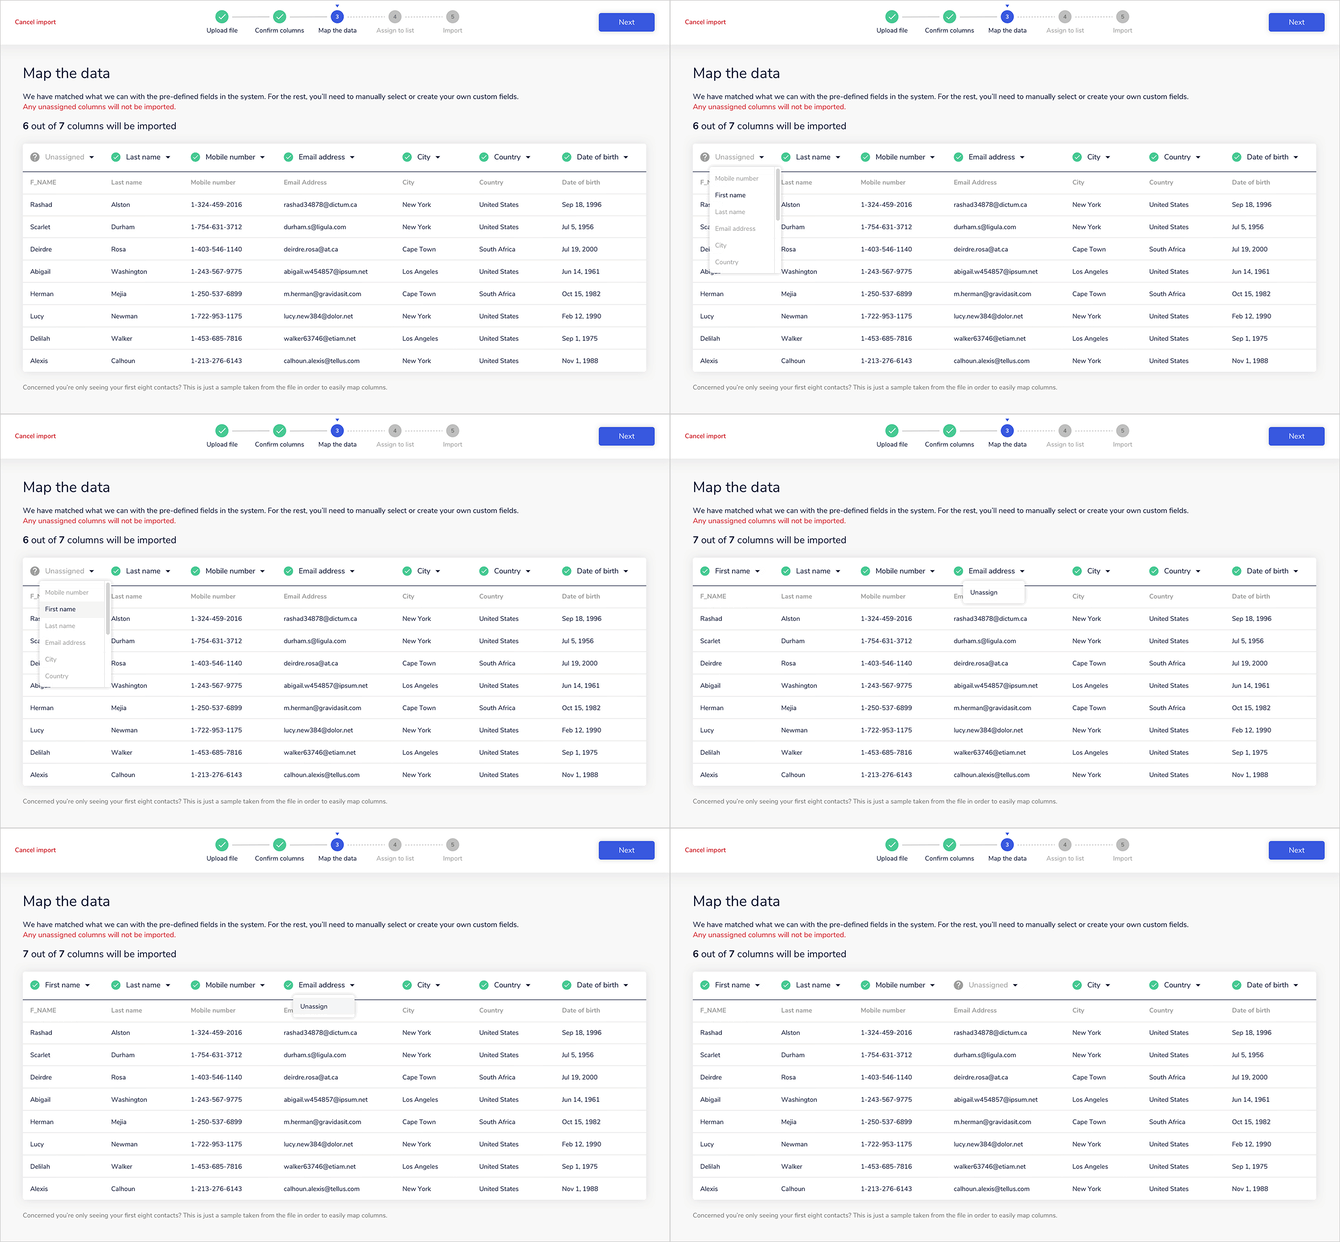
Step 3: Map the data
Use the dropdown above each column to tell Mobiz what type of data it contains. For anything that doesn't match a default column, create a custom column — see Creating custom columns to learn how.
For example, column one = first name, column two = mobile number. Note that any unassigned columns won't be imported.
Step 4: Number lookups
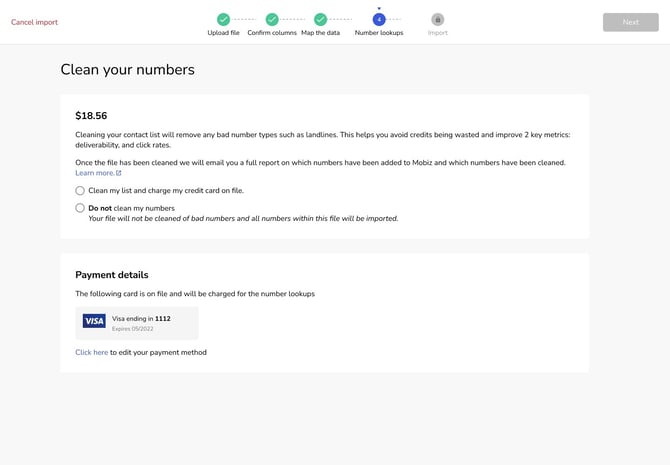
Decide whether to run your file through number lookups. A number lookup checks each phone number to confirm it's active, reachable, and correctly formatted.
Once the import finishes, Mobiz runs the lookup on all imported contacts. Any landlines are unsubscribed and moved to the Unsubscribed tab in your contacts section. The card on file will be charged for the lookup.
Unsubscribed numbers don't count toward your contact limit, and they can never be messaged through Mobiz.
Step 5: Import
Review your import before you begin.
You can select or create one or more lists to assign the contacts to, or add them to your contact database only.
Pro tip: Adding contacts to lists helps you segment your audience when you build a campaign. Learn more about creating lists.
When you're happy, click Start Import.
Depending on its size, your import may take a little while. We'll alert you in the app when it's done!